 Multi
Multi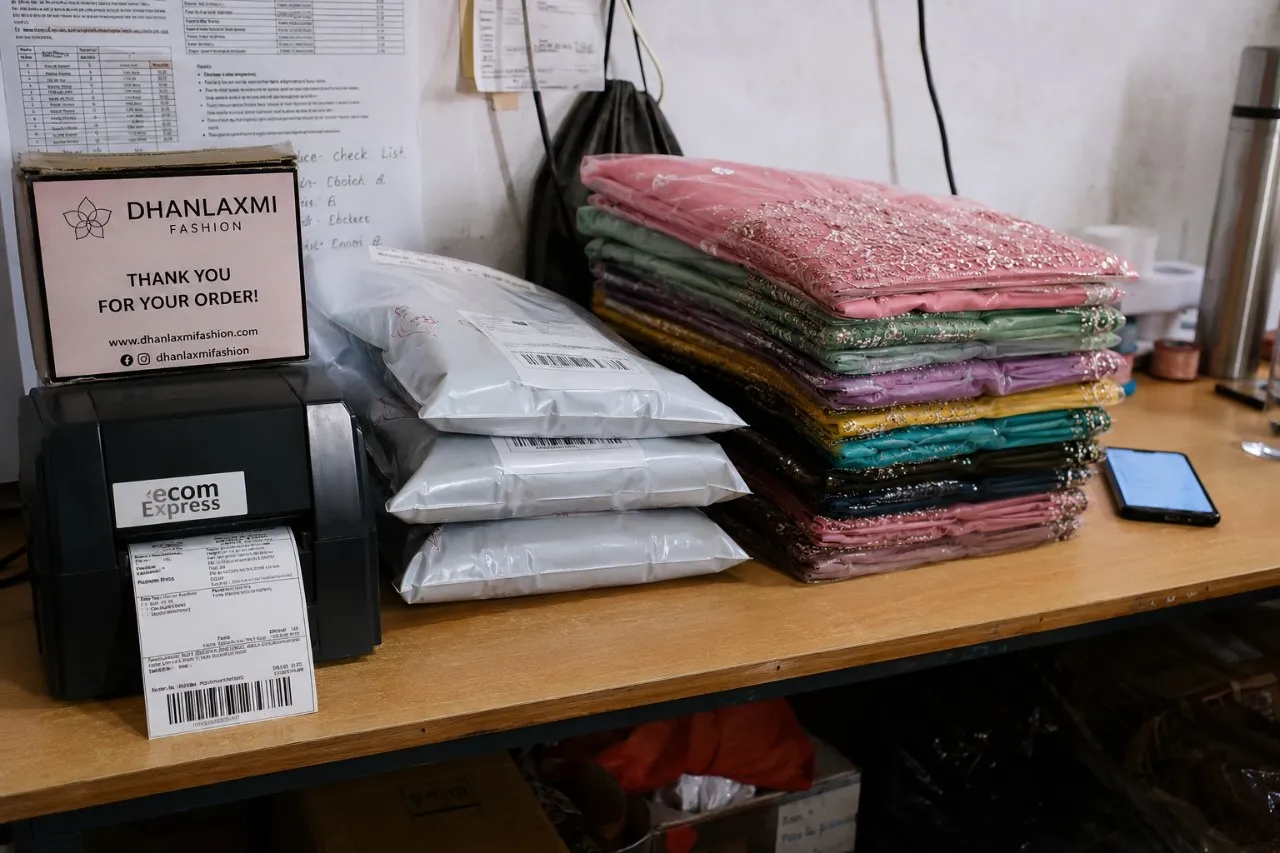
Stop Wasting Time on Flipkart & Meesho Shipping Labels (My Simple Trick to Dispatch 100+ Orders Fast)
Hey everyone. If you are selling online in India, you already know the daily struggle. Getting the orders on your dashboard is the fun part, but actually packing and dispatching them? That is a complete headache.
I remember when I first started getting around 40 to 50 orders a day. I was so happy! I had my stock ready—mostly ethnic stuff, beautiful georgette sarees with heavy diamond work, some kurtis, and a few western tops. I was packing them all nicely, putting in those little "thank you" cards for the buyers. But then came the absolute worst part of the entire day: printing those damn shipping labels from the Flipkart Seller Hub and the Meesho supplier panel.
If you are a beginner, you probably think you just click print and you are done. But no, the e-commerce portals don't make it that simple for us.
The Big A4 Paper Problem
Both of these portals—and even Amazon sometimes—give you your shipping labels in a standard A4 size PDF format. But think about it logically: nobody ships a small half-kg polybag with a massive A4 paper taped all over it! So what do most new sellers do?
We print the whole A4 paper out of our regular HP or Canon ink printers. Then we take a pair of scissors, and we literally sit there on the floor cutting out the 4x6 label part manually. Then we use an entire roll of cello tape just to stick that piece of paper onto the courier parcel so it doesn't tear off in transit.
It takes forever. When you have to dispatch 100+ parcels before the Ecom Express or Delhivery logistics guy arrives for his pickup at 4 PM, you realy don't have time for this arts and crafts project. Your hands get sticky from the tape, the scissors get dull, and half the time the tape wrinkles over the barcode making it impossible for the scanner to read it. Plus, the amount of ink and paper you waste is huge. It eats directly into your profit margins, and in the e-commerce clothing business, we all know margins are already tight enough.
Why Thermal Printers Are a Mess at First
So, after a few months of suffering, you finally decide to invest in a thermal printer. You buy something like a TVS, a TSC DA210, or maybe a Wizzit printer. You think your life is totally sorted becuase you don't need ink anymore and these sticker rolls print so fast. You load the 4x6 sticker roll, you open the Meesho A4 PDF, and you hit print.
But wait—it comes out completely wrong.
When you send that A4 PDF file directly to a small thermal printer, the computer's printing software tries to shrink the whole A4 page to fit inside that tiny 4x6 sticker. It prints all the empty white space, the instructions, and the label all squeezed together.
The barcode gets so tiny and blurry that the delivery hub scanner can't even read it. The text for the customer's address looks like tiny black dots. Next thing you know, the pickup boy refuses to take your parcels. Or worse, the pickup boy takes them, but your package gets stuck at the sorting warehouse, or returned to origin (RTO). Definetly a nightmare for our seller ratings, and RTO charges are the biggest killer of small businesses in India.
The Smart Fix: How to Crop Labels in 2 Seconds
I tried so many different ways to fix this. I tried taking screenshots of every single label on my laptop and then printing those screenshots. Way too slow. I tried opening the PDF in Photoshop to crop them one by one. Realy stupid idea when you have 50 or 100 labels to process every afternoon.
That is exactly why I started using the Meesho and Flipkart Label Cropper on our site, MultiToolPDF. It is literally built to fix this one exact problem for sellers like us. It does one thing, and it does it perfectly.
Here is my everyday workflow now, and it saves me at least two hours every single day:
- Step 1: Download in Bulk: I go to my Flipkart and Meesho seller dashboards and download all my pending labels in one single batch PDF file. (Yes, even if I have 150 orders and the PDF is 150 pages long, I just download the one big file).
- Step 2: Upload and Crop: I open my browser, go to MultiToolPDF, and select the E-commerce Label Cropper tool. I just drag and drop that massive PDF right into the box.
- Step 3: Magic Happens: In about two or three seconds, the tool scans all the pages. It automatically finds the actual label part with the barcode and the address, it cuts out all the useless white space, and it gives you a brand new PDF. This new PDF is perfectly sized for 4x6 thermal printers.
- Step 4: Print and Pack: I open the new cropped PDF and hit print. Every single label comes out crisp, sharp, and perfectly sized. No more scissors. No more cello tape. Just peel the sticker off the roll and stick it directly on the courier bag. It takes 5 seconds per parcel.
Why the Barcode Quality Matters So Much
A lot of sellers ask me, "Why can't I just zoom in and print?" When you use a proper cropping tool instead of just resizing the PDF manually or taking a screenshot, the tool preserves the original vector quality of the barcode.
The scanning machines at the logistics hubs read it instantly on the first beep. I have actually noticed a huge drop in my RTOs and delayed shipments just becuase the labels don't get rejected for being "unreadable" anymore. If the courier boy can scan it fast, your package gets out of your city faster.
No Server Uploads (Very Important for Privacy)
One thing I realy care about is customer data privacy. I don't want my buyers' names, home addresses, and phone numbers floating around on some random server on the internet.
The best part about using the MultiToolPDF label cropper is that it works right inside your web browser. It doesn't upload your sensitive shipping documents to a cloud server to process them. It does the cropping using your own computer's local power (client-side processing). So it is 100% private and secure. As soon as you close the tab, the data is gone. Nobody else ever sees your orders.
Quick Settings for Your Thermal Printer
If you are new to using thermal printing, buying the printer is only half the job. You also need to configure it correctly in Windows so the print doesn't look faded. Here are a few quick settings you need to change in your Windows control panel to get the darkest, sharpest print for your cropped labels:
- Go to Control Panel > Devices and Printers.
- Right-click on your thermal printer and select Printing Preferences.
- Go to the Page Setup tab and make sure your paper size is set to 4 in x 6 in (or 100mm x 150mm).
- Find the 'Darkness' or 'Density' setting in the graphics or options tab. Bump it up to around 12 or 13. (Don't put it to 15 or maximum, or it might burn the paper too much and make the barcode bleed).
- Slow down the 'Print Speed' to 2 or 3 inches per second. Printing slower gives the thermal head more time to heat up the paper, making the black ink super dark.
This makes the black lines on the barcode super thick and defined, so the courier scanners catch it easily even in bad lighting.
Conclusion: Focus on Sales, Not Tape
Honestly guys, if you are running a small e-commerce business, time is money. Every minute you spend struggling with a tape dispenser is a minute you aren't doing product research or checking your competitor's pricing.
Stop doing manual data entry and cutting paper. Set up your thermal printer, use a fast cropping tool like the one on MultiToolPDF, and spend your time focusing on your sales instead. The investment in a thermal printer and a good workflow will pay for itself in less than a month just from the money you save on A4 paper and cello tape alone!
Try this method out for your next batch of daily orders, you will definetly thank me later! Happy selling!
Comments (0)
Leave a Comment